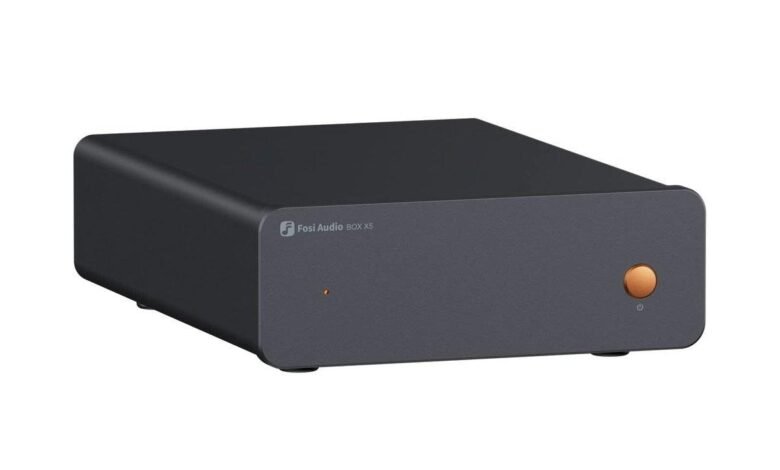
A phono stage is a small and simple device, but setting it up correctly makes a real difference to the sound of your records. A wrong connection can leave your music quiet, distorted or humming, while a careful setup will give you clean, full and detailed vinyl sound. This guide walks through the process step by step, from unboxing to your first record, so you can get it right the first time.
What You Need Before You Start
Before you begin, gather everything you will need. You will need your turntable, your phono stage, your amplifier or powered speakers, and a pair of RCA interconnect cables. Most phono stages include a power supply, either built in or as a separate wall adapter. You will also need a short length of ground wire, which usually comes attached to your turntable, and a level surface to place the phono stage on.
Choose a spot for the phono stage close to the turntable but away from sources of interference. Keep it away from power adapters, wireless routers and large transformers, all of which can introduce hum into the delicate cartridge signal.
Connecting the Turntable
Start with everything switched off. Connect the turntable’s RCA cables to the input of the phono stage, matching red to red and white to white. Then connect the turntable’s ground wire to the ground terminal on the phono stage. This small wire is easy to overlook, but it is essential. Without it, you will almost certainly hear an annoying mains hum through your speakers.
If your turntable has a built-in phono stage, switch it off before connecting to a separate phono stage. Running the signal through two phono stages will overload the sound badly. Most turntables with a built-in stage have a small switch on the back or underneath, labelled phono and line. Set it to phono when you use a separate phono stage.
Connecting to Your Amplifier
Next, connect the output of the phono preamp to a line-level input on your amplifier. Suitable inputs are labelled AUX, CD, Line or Tape. Do not connect the phono preamp output to the amplifier’s phono input, because that input already contains its own phono stage. Using both at once will make the sound loud, distorted and unpleasant.
If you use powered speakers, connect the phono preamp output to the line input on the speakers instead. The process is exactly the same, and the speakers provide the amplification that a separate amplifier would normally handle.
Setting Gain and Cartridge Type
Many phono preamps have switches for gain and cartridge type, usually on the back or underneath the unit. Set the cartridge switch to match your cartridge: moving magnet or moving coil. If you are unsure which you have, check the turntable manual. Most affordable turntables use moving magnet cartridges, so that setting is the safe default.
Gain switches are usually labelled low and high, or with decibel values. Moving magnet cartridges need lower gain, while moving coil cartridges need higher gain. Start with the lower setting for a moving magnet cartridge. The right gain gives you a healthy volume without any harshness.
5 Setup Checks Before Your First Record
- Ground wire connected: the turntable ground wire is firmly attached to the phono preamp terminal.
- Correct inputs: the turntable goes to the phono preamp input, and the phono preamp goes to a line input.
- Built-in stage off: the turntable’s internal phono preamp is switched off if you use a separate one.
- Cartridge setting correct: the moving magnet or moving coil switch matches your cartridge.
- Cables secure: all RCA plugs are pushed fully home and nothing is loose or touching.
Dealing With Hum and Noise
If you hear a hum after connecting everything, work through the causes methodically. First, check the ground wire. A loose or missing ground connection is the most common cause of hum in a vinyl setup. Tighten the terminal and make sure the wire has a clean metal contact.
Next, check the placement. Move the phono preamp away from power supplies and mains cables, and try routing the turntable cables away from power leads. If the hum changes when you move the cables, interference is the cause, and a new cable route will fix it. If the hum persists, try a different mains socket for the phono preamp, since a shared socket with a noisy device can sometimes be the culprit.
Testing and Fine Tuning
Once everything is connected, play a record you know well and listen carefully. The volume should be similar to your other sources, the bass should be full, and the treble should be smooth rather than harsh. Listen for the silence between tracks: a good setup is quiet, with no hum or hiss intruding on the music.
If the sound is too bright, check that the phono preamp is applying the correct equalisation, which it does automatically, and that you have not accidentally connected it through a second phono stage. If the bass sounds weak, check the ground wire and the cartridge connections.
See also: The Future of IoT: Transforming Industries and Everyday Life Through Smart Connectivity
Frequently Asked Questions
Where should I place my phono preamp?
Close to the turntable, on a stable shelf, and away from power adapters, routers and transformers. Short cables between the turntable and the phono preamp help to keep noise low.
Why is there a humming sound?
The most common cause is a missing or loose ground wire. Check the ground connection first, then look at cable routing and nearby sources of interference.
Do I need special cables for a phono preamp?
Standard RCA interconnects work well. You do not need expensive cables, but make sure the plugs fit snugly and the cables are not damaged.
Final Thoughts
Setting up a phono preamp takes only a few minutes, but doing it carefully pays off every time you play a record. Connect the turntable to the input, the output to a line input, attach the ground wire, and set the cartridge switch to match. Check for hum, play a familiar record, and listen. When the setup is right, the music will sound full, warm and detailed, and your vinyl collection will finally get the sound it deserves.